 Save
Save One Sunday afternoon, I opened the fridge to find leftover pepperoni and a tub of Greek yogurt I'd forgotten about. I'd been craving something warm and cheesy, but I didn't want to order takeout or blow my macros. That's when I remembered the two-ingredient dough trick I'd seen online and thought, what if I turned this into pizza rolls with actual protein? Twenty minutes later, my kitchen smelled like a pizzeria, and I was pulling golden, bubbling rolls out of the oven. I ate three immediately, burned my tongue, and didn't care one bit.
I made these for a potluck at work once, and they disappeared faster than anything else on the table. My coworker who's always dieting asked for the recipe, convinced they were full of butter and carbs. When I told her the dough was basically yogurt and flour, she didn't believe me until I sent her a photo of the ingredients. Now she makes them every week and texts me updates on her favorite filling combinations.
Ingredients
- Plain Greek yogurt (nonfat or low fat): This is the magic ingredient that keeps the dough soft and adds serious protein without any rising time, just make sure it's thick and not watery.
- Self-rising flour: The baking powder already mixed in gives the dough its lift, but if you don't have it, you can easily make your own with all-purpose flour, baking powder, and a pinch of salt.
- Egg: Binds everything together and adds a bit of richness, plus it helps the dough hold its shape when you roll it up.
- Garlic powder and salt: These season the dough itself so every bite has flavor, not just the filling.
- Lean ground beef: I use the leanest I can find to keep the fat down, and browning it with Italian herbs makes it taste like real pizza topping.
- Turkey or beef pepperoni slices: They add that classic pizza taste and a little bit of saltiness, and turkey pepperoni keeps it lighter if you're watching calories.
- Shredded part-skim mozzarella cheese: Melts perfectly and gives you those cheese pulls without overdoing the fat content.
- Pizza sauce: Any jarred sauce works, but I like one with a little garlic and basil already in it.
- Dried Italian herbs: A quick sprinkle of oregano and basil makes everything smell and taste like a pizzeria.
- Black pepper and crushed red pepper flakes: Just enough heat to wake up your taste buds without overpowering the cheese and meat.
- Olive oil: A light brush on top before baking gives the rolls a golden, crispy finish.
- Grated Parmesan cheese: Adds a salty, nutty flavor that crisps up beautifully in the oven.
- Dried parsley or Italian herbs: A final sprinkle makes them look and taste like you really put in effort.
Tired of Takeout? 🥡
Get 10 meals you can make faster than delivery arrives. Seriously.
One email. No spam. Unsubscribe anytime.
Instructions
- Get your oven ready:
- Preheat to 400°F (200°C) and line a baking sheet with parchment paper so nothing sticks. This also makes cleanup a breeze.
- Brown the beef:
- Cook the ground beef in a nonstick skillet over medium heat, breaking it up with a spoon until it's fully browned and crumbly, about 4 to 5 minutes. Drain any excess fat, then stir in black pepper and Italian herbs before setting it aside to cool a bit.
- Make the dough:
- In a large bowl, mix Greek yogurt, self-rising flour, egg, garlic powder, and salt until a sticky dough forms. Turn it out onto a lightly floured surface and knead for 2 to 3 minutes until it's smooth and no longer tacky.
- Roll it out:
- Use a rolling pin to shape the dough into a rectangle about 12 by 10 inches. Don't stress if it's not perfect, just aim for an even thickness so the rolls bake evenly.
- Spread the sauce:
- Spoon pizza sauce evenly over the dough, leaving a half-inch border around the edges. This keeps the filling from oozing out when you roll it up.
- Add the filling:
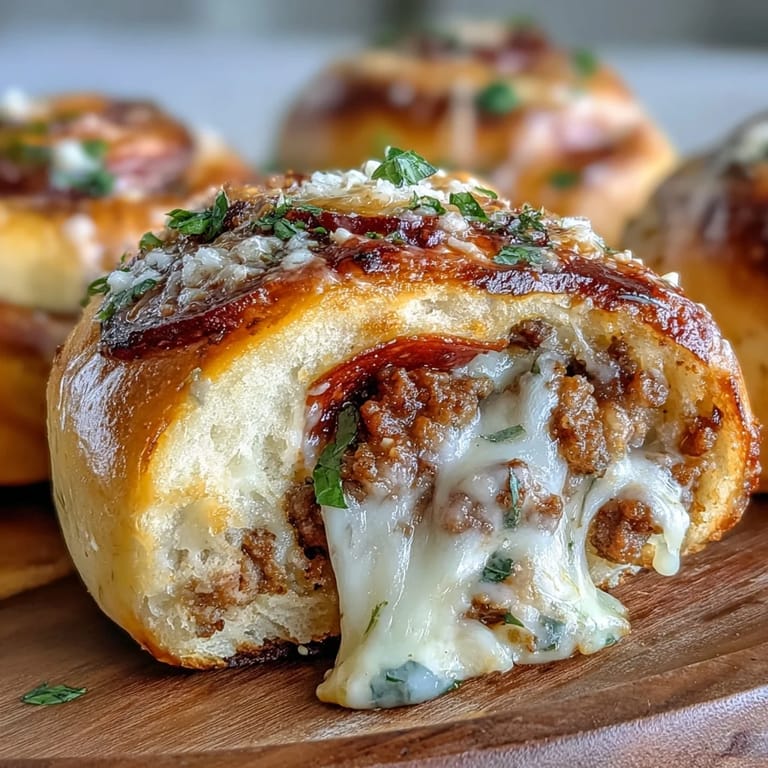
- Scatter the cooked beef, pepperoni slices, and mozzarella cheese evenly over the sauce. Try to distribute it all the way to the edges so every roll gets a good amount of filling.
- Roll it up:
- Starting from a long edge, tightly roll the dough into a log, keeping it as even as possible. A tight roll means the filling stays inside and the rolls hold their shape.
- Slice into rolls:
- Use a sharp knife to cut the log into 12 equal pieces. I like to cut it in half first, then cut each half into 6 pieces.
- Prep for baking:
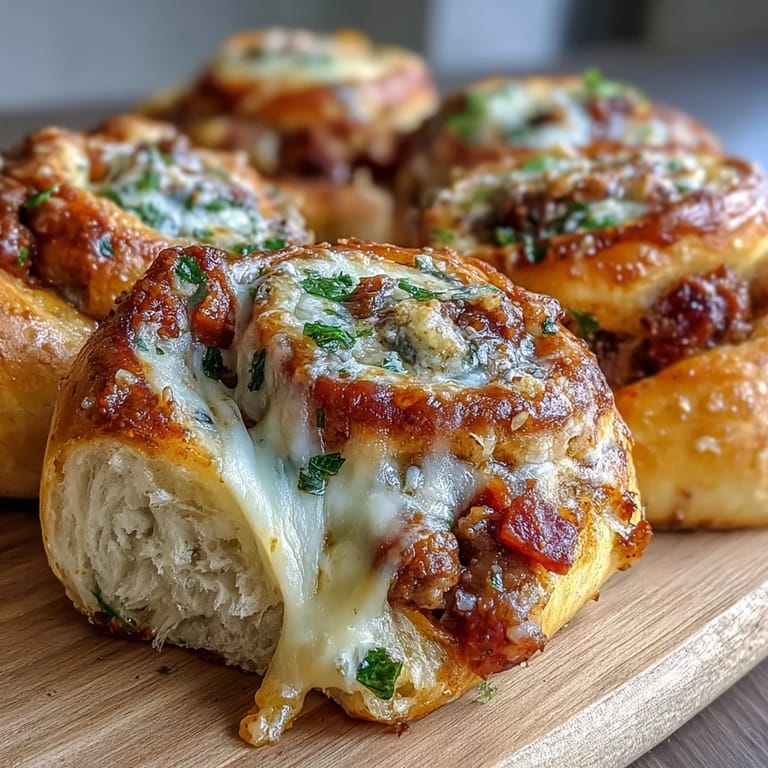
- Arrange the rolls cut-side up on your prepared baking sheet, leaving a little space between each one. Brush the tops lightly with olive oil, then sprinkle with Parmesan and dried parsley or Italian herbs.
- Bake until golden:
- Slide the tray into the oven and bake for 18 to 22 minutes, or until the rolls are golden brown and the cheese is bubbling. Your kitchen will smell incredible.
- Cool and serve:
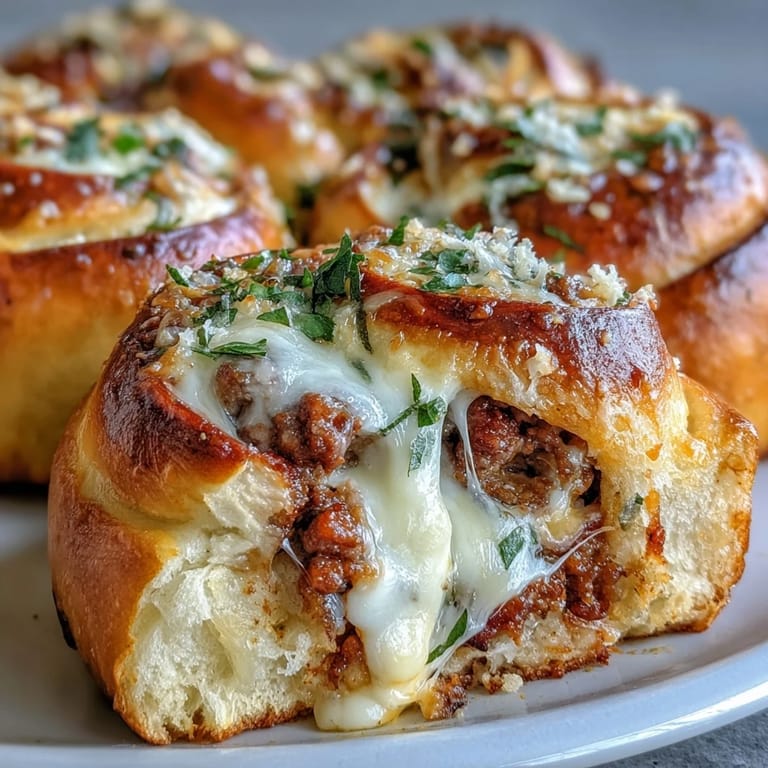
- Let the rolls cool for a few minutes before digging in. They're molten hot straight out of the oven, and trust me, it's worth the wait.
 Save
Save The first time I packed these for lunch, my gym buddy saw me heating one up in the microwave and assumed it was some sad diet food. Then I offered her a bite, and she spent the rest of the week asking me to bring extras. Now we both meal prep them on Sundays, and it's become this unspoken Sunday ritual where we text each other photos of our rolled-up logs before baking. It's funny how a simple recipe can turn into a shared tradition.
Make It Your Own
This recipe is incredibly forgiving, so feel free to swap the beef for ground turkey or chicken if that's what you have on hand. I've also added finely chopped bell peppers and spinach to the filling when I'm trying to sneak in more veggies, and it works beautifully. If you like things spicy, double the crushed red pepper flakes or add a drizzle of hot sauce to the pizza sauce before spreading it. You can even switch up the cheese, pepper jack gives it a nice kick, and a little cheddar mixed in adds a sharper flavor.
Storing and Reheating
These rolls keep in an airtight container in the fridge for up to four days, and they reheat beautifully in the microwave for about 30 seconds or in the oven at 350°F for 8 to 10 minutes. I love freezing a batch in a single layer on a tray, then transferring them to a freezer bag once they're solid. When I need a quick meal, I pop a couple straight from the freezer into the oven at 350°F for 10 to 12 minutes, and they come out just as good as fresh. Meal prep has never been easier or more delicious.
Serving Suggestions
I usually serve these with a side of marinara or ranch for dipping, and it takes them to the next level. A simple green salad with a light vinaigrette balances out the richness, and if I'm really hungry, I'll add some roasted veggies or a cup of soup. They're also perfect for game day, packed lunches, or even a quick dinner when you don't feel like cooking something elaborate.
- Serve with extra marinara, ranch, or garlic aioli for dipping.
- Pair with a crisp side salad or roasted vegetables for a complete meal.
- Pack them in lunchboxes with some fruit and veggies for a balanced, portable meal.
 Save
Save These pizza rolls have become my go-to whenever I need something quick, filling, and actually good for me. I hope they become a staple in your kitchen too, whether you're feeding a crowd, prepping for the week, or just treating yourself to a cozy homemade snack.
Recipe FAQs
- → Can I freeze these rolls?
Yes, these freeze exceptionally well. Wrap cooled rolls individually in plastic wrap and store in freezer bags for up to 3 months. Reheat from frozen at 350°F for 10–12 minutes.
- → What makes the dough protein-rich?
The combination of Greek yogurt and self-rising flour creates a dough with significantly more protein than traditional pizza dough. Each roll contains approximately 14 grams of protein.
- → Can I make these without beef?
Absolutely. Substitute lean ground turkey or chicken for the beef. You can also make a vegetarian version by adding extra vegetables like bell peppers, spinach, or mushrooms.
- → How do I make self-rising flour?
Mix 2 cups of all-purpose flour with 3 teaspoons of baking powder and 1/2 teaspoon of salt. Whisk thoroughly to combine before using in the dough.
- → Can I prepare these ahead of time?
Yes. Assemble and slice the rolls, then refrigerate covered for up to 24 hours before baking. Alternatively, bake completely and store in the refrigerator for 3–4 days.
- → What can I serve with these rolls?
These pair well with a simple green salad, marinara dipping sauce, or roasted vegetables. They're substantial enough to serve as a main dish for lunch or dinner.