 Save
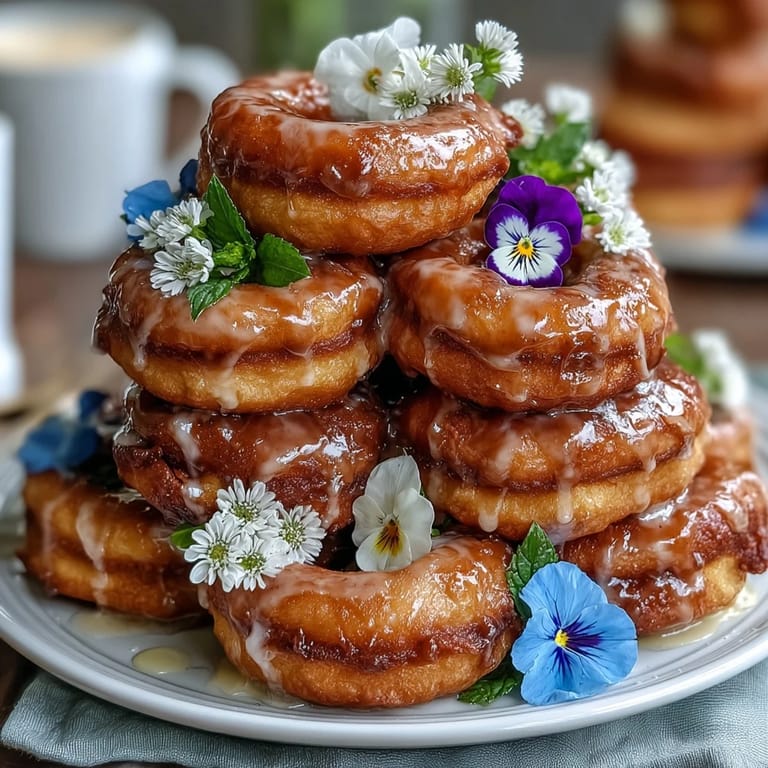
Save My sister called me three weeks before her baby shower in a mild panic—she needed something that looked fancy but wouldn't stress her out, and ideally something guests could actually eat without forks. I was arranging flowers at my kitchen table when it hit me: mini donuts stacked like a tower with blooms tucked between them. She loved it so much that now every spring celebration in our family starts with someone asking, "Can we do the donut tower again?"
I'll never forget watching my sister's face light up when guests started arriving and saw the tower sitting on her dining table—the soft pink glaze catching the afternoon light, tiny purple and yellow flowers nestled between the donuts like they'd grown there naturally. One of her friends actually gasped and immediately asked for photos, and that's when I knew we'd created something special.
Ingredients
- Mini Donuts: 36–40 of them in plain, glazed, or assorted flavors—variety is your friend here, and buying them pre-made means you can spend energy on the styling instead.
- Powdered Sugar: 1 cup (120 g) mixed with milk or water creates the perfect delicate glaze that doesn't overpower the donuts themselves.
- Milk or Water: 2–3 tablespoons to reach that silky glaze consistency—start with less and add gradually so you don't end up with a runny mess.
- Vanilla Extract: 1/2 teaspoon optional but adds a warmth that makes people pause and ask what that lovely smell is.
- Food Coloring: Optional, but pastel shades feel more sophisticated and bloom-like than bright neon.
- Sprinkles: 1/4 cup rainbow or pastel—these catch light and add texture without making things look childish.
- Edible Flowers: 1 cup total of violets, pansies, nasturtiums, or marigolds—confirm they're pesticide-free and actually labeled as edible, not just pretty.
- Fresh Mint Leaves: Optional but they add a pop of green and smell incredible when someone brushes past the tower.
- Foam Cone or Tiered Stand: About 10–12 inches high—the foam cone is easier and more forgiving, though a cake stand looks elegant if you're going formal.
- Toothpicks or Wooden Skewers: For securing donuts to the cone without them sliding around mid-party.
Tired of Takeout? 🥡
Get 10 meals you can make faster than delivery arrives. Seriously.
One email. No spam. Unsubscribe anytime.
Instructions
- Make Your Glaze (If Desired):
- Whisk powdered sugar with milk or water until smooth and glossy, then add vanilla if you're using it. A few drops of pastel food coloring transforms it into something that feels intentional rather than plain. Let yourself have fun with this part—the glaze is forgiving.
- Coat the Donuts:
- Dip each mini donut halfway into the glaze, let the excess drip off, then immediately sprinkle if you're using them. Set them on parchment paper while you work so they don't stick to your workspace. This takes patience but it's oddly meditative, and 15 minutes of setting time gives you a break to sip coffee.
- Prepare Your Base:
- Place the foam cone on a serving platter or set up your tiered stand in its final location—moving it around once it's loaded is a recipe for disaster. Make sure it's stable and won't tip if someone brushes by it.
- Build From the Bottom Up:
- Start at the widest part of the cone and insert toothpicks at slight downward angles, then press donuts onto them in overlapping circles working upward. You're essentially creating a spiral that gets tighter as you climb, and it's satisfying to watch it take shape.
- Tuck In the Flowers:
- Once the donuts are in place, gently wedge edible flowers and mint leaves between them, rotating around the tower so it looks naturally blooming from all angles. The flowers should peek out like they're growing right through the donuts, not feel glued on.
- Fill the Gaps:
- Any bare spots get a few more flowers or a sprinkle of extra sprinkles—step back and look at it from a distance to make sure it reads as intentional. This is where your instincts take over; trust them.
- Chill or Serve:
- Serve immediately for the best presentation, or cover loosely with plastic wrap and refrigerate for up to 4 hours. If you're making it ahead, let it sit at room temperature for 15 minutes before guests arrive so everything tastes fresh.
 Save
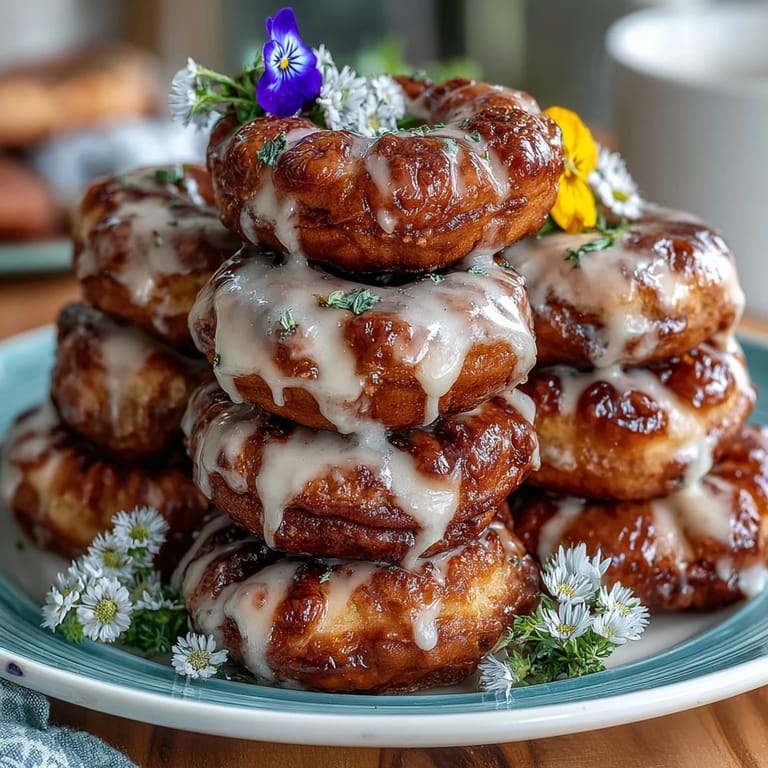
Save What surprised me most was how this tower became a centerpiece people were genuinely hesitant to disturb—they wanted photos first, which meant I'd accidentally created something that was both functional dessert and event decoration. By the time people actually started eating them, there was this collective moment of relief, like permission had been granted to enjoy something that looked this good.
Choosing Your Donuts
The donut choice sets the whole tone of the tower. Plain glazed donuts read as elegant and simple, while assorted flavors (chocolate, vanilla, cinnamon sugar) create visual interest and give guests options. I once made one entirely with chocolate-glazed donuts and added white flowers, and the contrast was stunning—the key is thinking about how colors play together, not just grabbing whatever's in the bakery case. Don't shy away from flavors either; a tower of maple, coconut, and plain donuts tastes like an actual celebration.
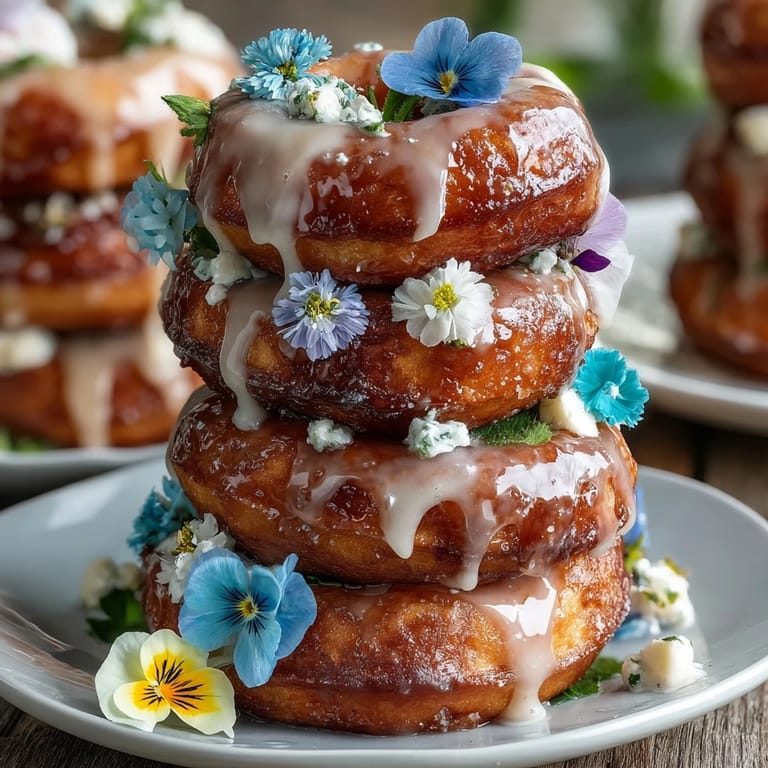
The Flower Game
Flowers are what transform this from "donut stack" to "event centerpiece," but they need to be treated like actual ingredients, not afterthoughts. Pansies hold their color beautifully, violets feel delicate, nasturtiums add a peppery note if someone nibbles one, and marigolds are surprisingly bold. I learned to order edible flowers from specialty grocers a day ahead rather than hoping the regular grocery store has them—they're usually fresher, and the selection is wider. Tuck them in while they're still perky and use mint as your green filler; it's foolproof and smells incredible.
Timing and Storage
The magic window is assembling the tower 2–4 hours before guests arrive, which gives you enough time to set up without the donuts drying out or flowers wilting. If you're making it the night before, store it uncovered in the fridge and bring it out about 15 minutes before serving so the donuts soften slightly and taste fresh rather than cold. I once made one 6 hours early and the flowers got droopy, so now I treat the 4-hour mark as my deadline—anything beyond that and you're pushing your luck.
- Glaze the donuts while you're thinking clearly and not rushed; this step is easier on its own timeline.
- Keep edible flowers cool until the last moment so they stay perky and don't brown at the edges.
- If donuts start sliding on their toothpicks, your cone might be too soft or the angle too steep—gently adjust rather than forcing them.
 Save
Save This tower has become my answer to any celebration that needs grace without stress. It's become a tradition, the kind of thing that makes people smile before they even taste it.
Recipe FAQs
- → What type of donuts work best for the tower?
Choose plain, glazed, or assorted mini donuts that are firm enough to hold their shape when skewered. Variety adds visual interest.
- → How do I prepare the glaze for decorating?
Mix powdered sugar with milk or water until smooth. Add vanilla extract and optional food coloring for pastel hues before dipping donuts.
- → Which flowers are safe to use for decoration?
Use only edible flowers like violets, pansies, nasturtiums, and marigolds that are pesticide-free and safe for consumption.
- → How should the donuts be attached to the tower?
Secure donuts by gently pushing toothpicks or skewers into the foam cone or assembled tiers, layering from bottom to top.
- → Can this tower be made in advance?
Assemble the tower shortly before serving or cover loosely with plastic wrap and refrigerate for up to 4 hours to maintain freshness.