 Save
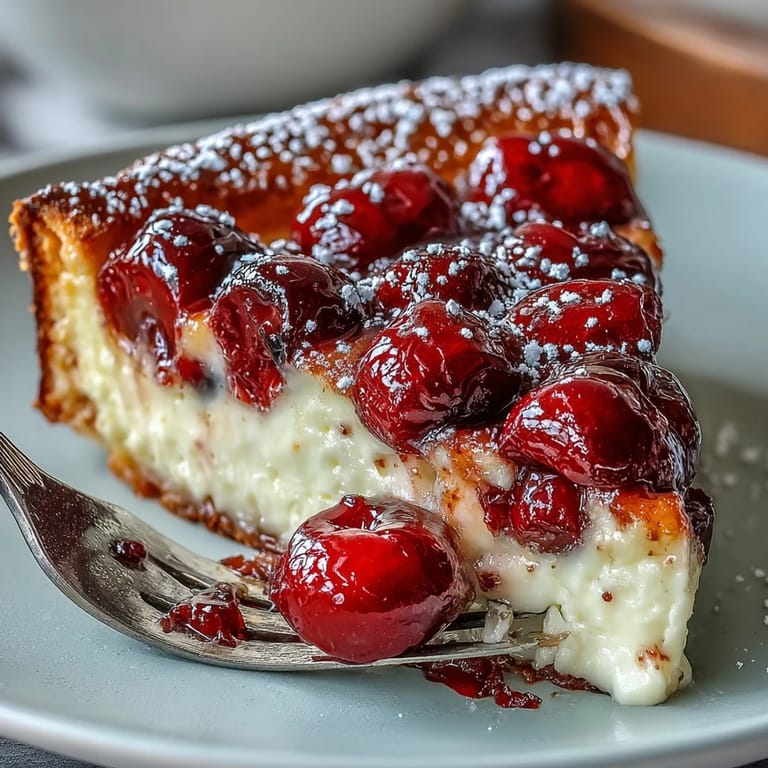
Save The first time the scent of baking clafoutis filled my kitchen, it was the thick sweetness of cherries tangled with a hint of warm vanilla that made me pause what I was doing and just breathe it in. There’s something almost magical about the way simple fruit—still juicy from the market—transforms with a few whisks and a gentle rise in the oven. I hadn’t planned on a fancy dessert that day, but a basket of cherries had practically begged me for the honor. Suddenly, a classic French favorite was alive in my home, and it felt effortless. The anticipation of that wobbly, golden custard had me sneaking peeks through the oven door, feeling more like an eager kid than a baker.
I once whipped this up on a muggy July evening, rushing a bit to beat a summer thunderstorm that rumbled ominously outside. My friend Claire arrived early and ended up helping me pit cherries, staining our fingers in the process—she teased that we’d earned dessert before it even hit the oven. When we finally dug in, warm clafoutis still steaming, we had to laugh about how low-key desserts sometimes create the best memories. It’s become our go-to promise: if there are cherries, there’ll soon be clafoutis.
Ingredients
- Fresh cherries (400 g/about 3 cups): Juicy and vibrant, these are the soul of the clafoutis—choose ones that are glossy and firm for the best bite. Pitting them can be messy but oddly satisfying—just mind your shirt!
- Large eggs (3): They bind the custard and bring that gorgeous, slightly bouncy texture. I always use room temperature eggs so the batter isn’t shocked when you add melted butter.
- Granulated sugar (100 g/1/2 cup): Sweetens gently, letting the fruit shine—don’t be tempted to go overboard.
- Vanilla bean (1 or 2 tsp extract): Scraping the seeds in gives those tiny aromatic flecks and a perfume that lingers. If using extract, stir it in with love—either way, don’t skip!
- Pinch of salt: Just enough to balance the flavors and wake everything up.
- All-purpose flour (90 g/3/4 cup): A little goes a long way to give the custard structure without making it dense. Sift it for a smooth, clump-free batter.
- Whole milk (250 ml/1 cup): Makes the custard light but rich—don’t swap for skim or you’ll lose some magic.
- Heavy cream (60 ml/1/4 cup): Adds an extra layer of silkiness—totally worth it.
- Unsalted butter, melted and cooled (30 g/2 tbsp): Sneaks in richness and helps the dessert brown beautifully. Cool it slightly so it doesn’t scramble your eggs.
- Unsalted butter for greasing (1 tbsp): Ensures easy release later (and a crisp golden edge).
- Sugar for dusting pan (1 tbsp): Encourages the crust to caramelize just enough for a subtle crunch.
- Powdered sugar (for serving, optional): A snowy finish that feels a bit fancy—sift gently right before serving.
Tired of Takeout? 🥡
Get 10 meals you can make faster than delivery arrives. Seriously.
One email. No spam. Unsubscribe anytime.
Instructions
- Get the Oven Going:
- Set your oven to 180°C (350°F), feeling that little pop of warmth as you prep everything else.
- Prepare the Baking Dish:
- Rub the dish with butter until every inch is glossy, then sprinkle in sugar—tilt and shake for full coverage and listen for those tiny crystals rattling around.
- Add the Cherries:
- Tumble in your pitted cherries, scatter them evenly, and resist the urge to eat half while you work.
- Make the Custard:
- In a bowl, whisk eggs and sugar until they go pale and slightly fluffy—watch as the grains dissolve and the mix thickens with promise.
- Add Vanilla and Salt:
- If using a bean, split and scrape those seeds straight in alongside a pinch of salt; if using extract, just pour—and inhale deeply.
- Incorporate the Flour:
- Sift the flour over the batter, then whisk gently until just combined, watching for smoothness but not overmixing.
- Add Milk, Cream, and Butter:
- Pour in the milk gradually, followed by cream and cooled melted butter, whisking into a silky, pourable custard—don’t worry if it seems thin.
- Assemble and Pour:
- Carefully pour the custard over the cherries—watch the fruit peek up, then settle as the batter pools around them.
- Bake:
- Slide the dish into the oven and bake for 35–40 minutes, until the top is puffed and golden, the center just set, and the kitchen smells unreal.
- Finish and Serve:
- Let it cool for a few minutes, dust with powdered sugar if you like, and serve warm or at room temp—both are divine.
 Save
Save The quiet joy of this dish always seems to linger longer than the last slice. One evening, my younger brother—never one for sweets—reached for seconds, then sheepishly blamed the 'just-right' gooey cherries. We wound up laughing over plates, finally agreeing some desserts really do bring you back to the table, no matter your sweet tooth.
Letting Seasonal Fruit Shine
Fresh, in-season cherries truly make a difference—don’t hesitate to walk an extra block for the deep red gems at your favorite market. Unlike desserts overloaded with sugar, clafoutis keeps things light enough to let the fruit star. With each bite, you taste sunshine and sometimes even spot tiny cherry juice bubbles rising along the custard. If cherries are out of season, try plums or apricots! Just be sure any substitute is ripe and not too tart.
Getting the Texture Just Right
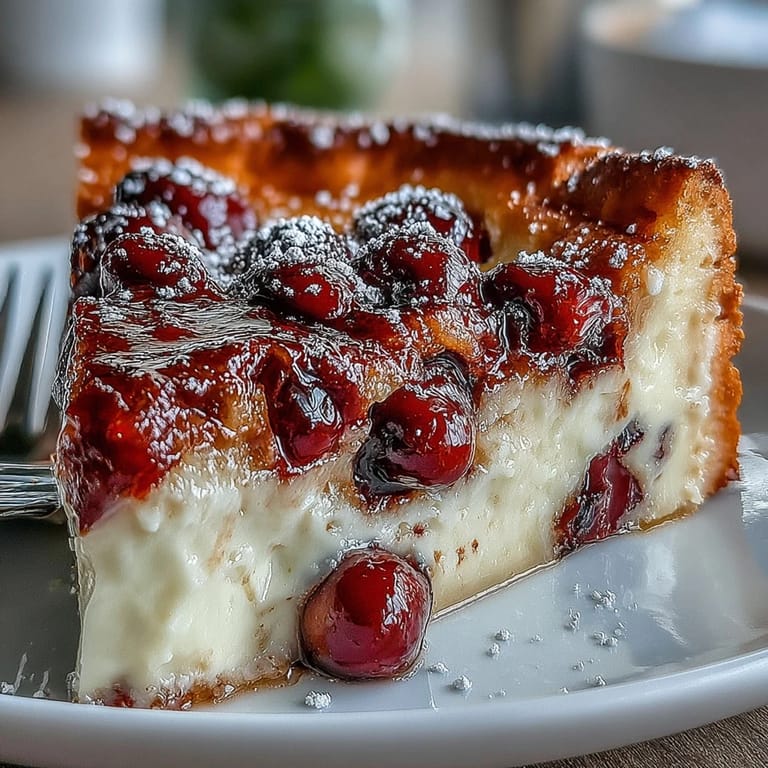
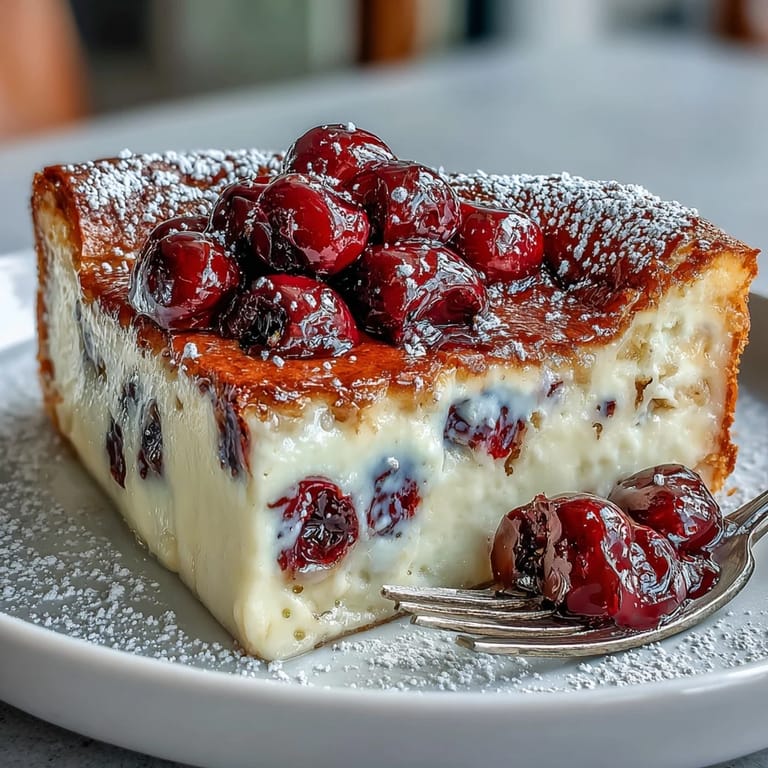
The real secret behind an irresistible clafoutis is nailing that delicate, not-quite-set custard—think of it as somewhere between a pancake and a flan. I once overbaked it by five minutes and ended up with something more like a firm cake, which was still edible but far less dreamy. Check at 35 minutes by gently nudging the dish, and if the center still has a gentle wobble, you’re golden. Don’t stress about a minor crack on top; the powdered sugar covers all. Enjoy the contrast of edges that are slightly chewy with a pillowy, creamy middle.
Simple Ways to Elevate Your Clafoutis
Even a classic can be coaxed in new directions—try a splash of amaretto in the batter for a faint nutty perfume, or serve with barely sweetened whipped cream for an extra treat. If you want to impress, split and scrape that vanilla bean right in front of guests—the little black seeds will win hearts and spark conversation. I’ve found that using a cast iron skillet gives especially lovely caramelized sides and looks great when served straight from the oven.
- Always use a sieve for the flour for ultimate smoothness.
- Letting it cool slightly before serving helps the flavors settle.
- Be sure to check for rogue cherry pits before serving, no matter how certain you are!
 Save
Save Baking clafoutis always reminds me how little it takes to bring a little luxury to a simple night in. Here’s to catching cherry season before it slips away—enjoy every bite!
Recipe FAQs
- → Do cherries need to be pitted?
Pitting is recommended for easy eating and to avoid unexpected bites, though some prefer leaving a few whole for a subtle almond-like hint. If leaving pits, warn diners and bake a bit longer to prevent excess moisture.
- → Can I use frozen cherries?
Yes — thaw and drain frozen cherries thoroughly to avoid a soggy custard. Pat dry and spread evenly in the pan; you may reduce baking time slightly if cherries release less liquid.
- → Vanilla bean or extract: which is better?
Vanilla bean adds visible seeds and a deeper aromatic profile, while pure vanilla extract is a convenient alternative. Use seeds for show and flavor, or two teaspoons extract if beans aren't available.
- → How should the custard look when done?
The custard should be puffed, set at the edges, and slightly springy in the center. A knife inserted in the middle should come out mostly clean with minimal moist crumbs — avoid overbaking to keep a tender texture.
- → Any tips for baking even texture?
Whisk batter until smooth but avoid overworking the flour. Use room-temperature dairy and eggs for an even emulsion, and bake in the center of the oven for consistent heat. Let it rest briefly after baking to settle.
- → Best ways to serve and store leftovers?
Serve warm or at room temperature, dusted with powdered sugar and optionally with whipped cream or vanilla ice cream. Store cooled leftovers covered in the fridge for up to 2 days; reheat gently in a low oven to restore warmth and texture.