 Save
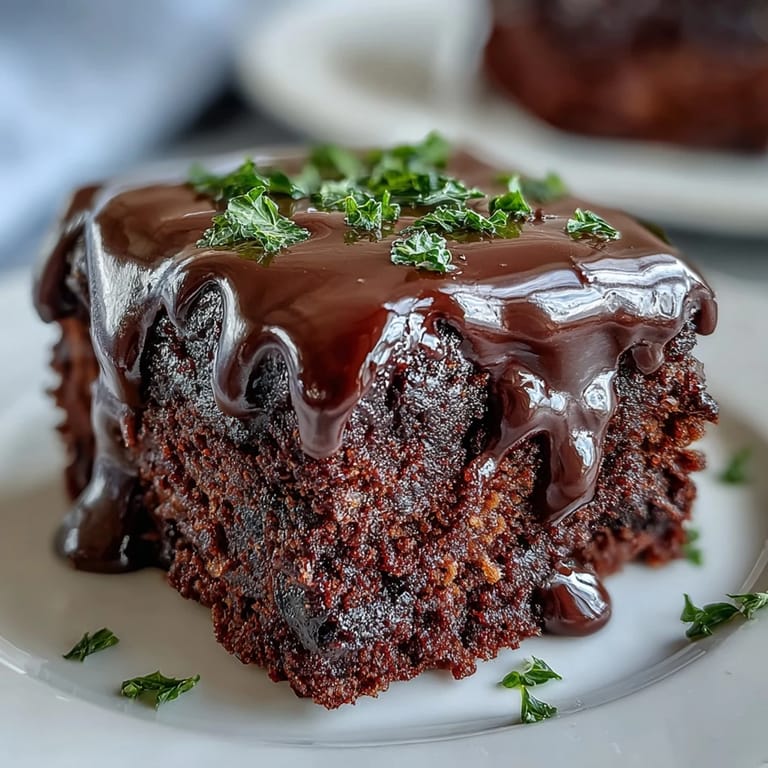
Save My neighbor knocked on my door three days before St. Patrick's Day with a box of cookie cutters she'd picked up at an estate sale, shamrocks tumbling across the kitchen counter like she'd just struck gold. That's when it hit me—why settle for plain green cookies when you could have rich, fudgy chocolate brownies cut into festive shapes? The combination felt like pure magic, and I spent that afternoon testing batches, watching the emerald icing come together. What started as a neighborly chat turned into something I'd make every March since.
I made these for my daughter's class party last year, and watching twenty kids' faces light up when they bit into the chocolate was worth every minute of prep. One kid asked if they were magic because they were so pretty, and honestly, that made my whole week. It's funny how a brownie with icing can shift a simple celebration into something everyone remembers.
Ingredients
- Unsalted butter, 1/2 cup: Room temperature butter helps incorporate air into the batter, giving you that perfect fudgy-yet-light crumb—cold butter fights you every step.
- Granulated sugar, 1 cup: This sweetens and creates structure; don't skimp on quality here because it affects texture more than you'd think.
- Large eggs, 2: They bind everything together and add moisture—room temperature eggs mix more evenly without lumps.
- Vanilla extract, 1 teaspoon: This deepens the chocolate flavor in ways people can't quite name but absolutely taste.
- Unsweetened cocoa powder, 1/3 cup: The real star of the show; use good quality cocoa because brownies are too simple to hide inferior ingredients.
- All-purpose flour, 1/2 cup: Keeps things tender—measure by spooning into the cup and leveling rather than scooping, which packs too much flour.
- Salt, 1/4 teaspoon: A pinch of salt doesn't taste salty; it amplifies the chocolate flavor and adds complexity.
- Baking powder, 1/4 teaspoon: Just enough lift to prevent dense hockey pucks while keeping that fudgy center you're after.
- Powdered sugar, 1 1/2 cups: The base for silky icing; sift it if you see lumps or your icing will feel grainy.
- Softened butter for icing, 2 tablespoons: Softened butter whips in smoothly without creating tiny butter streaks throughout your icing.
- Milk, 2 tablespoons: This thins the icing to spreadable consistency—add it gradually because you can always add more but can't take it back.
- Green food coloring, as needed: Start with one drop and build up slowly or you'll overshoot into swamp territory before you know it.
- Green sprinkles or sanding sugar, optional: These add festive sparkle and a little textural contrast that makes people feel fancy.
Tired of Takeout? 🥡
Get 10 meals you can make faster than delivery arrives. Seriously.
One email. No spam. Unsubscribe anytime.
Instructions
- Prepare your pan:
- Line an 8x8-inch baking pan with parchment paper, letting it drape over two sides so you can lift the whole batch out later. This extra step saves you from crumbly disasters when you try to extract them.
- Melt and mix the base:
- Melt butter over low heat in a saucepan, then remove from heat and stir in sugar, eggs, and vanilla until everything feels smooth and well combined. This gentle approach prevents the eggs from scrambling and creates a silky foundation.
- Add the dry ingredients:
- Sprinkle in cocoa powder, flour, salt, and baking powder, then mix just until no streaks of cocoa remain—overmixing develops gluten and turns brownies tough and cakey. You're looking for about ten gentle stirs, not an aggressive workout.
- Bake to fudgy perfection:
- Pour batter into your prepared pan, smooth the top with a spatula, and bake at 350°F for 25 to 30 minutes until a toothpick inserted in the center comes out with a few moist crumbs still clinging to it. That residual moisture is what keeps these brownies fudgy even after a few days.
- Cool completely:
- Let the brownies sit in the pan on a wire rack until they're room temperature, which usually takes about an hour. Rushing this step means cutting warm brownies that crumble apart instead of holding their shape.
- Whip up the icing:
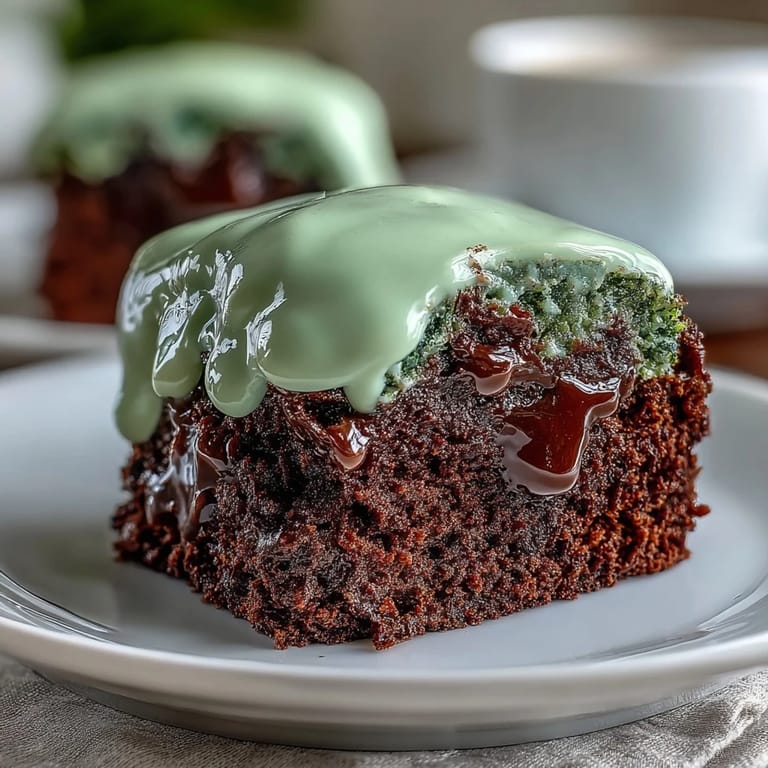
- While brownies cool, beat softened butter and powdered sugar together until fluffy, then add milk and vanilla until spreadable. Add green food coloring drop by drop, stirring between additions until you reach that perfect leprechaun green.
- Cut and decorate:
- Once cooled, lift the entire brownie slab from the pan and start cutting shamrocks with a cookie cutter, wiping the cutter clean between cuts so you get sharp edges. Spread a generous amount of green icing over each shamrock and top with sprinkles if you're feeling festive.
- Let icing set:
- Give the icing about 15 to 20 minutes to firm up slightly before serving, though these taste just as good when the icing is still a bit soft.
 Save
Save There's something about handing someone a green-frosted brownie that feels less like you're serving dessert and more like you're sharing a little moment of joy. These brownies have a way of bringing people together, whether it's an official St. Patrick's Day gathering or just a random Tuesday when someone needs cheering up.
Troubleshooting Common Issues
Brownies came out cakey? You likely mixed the dry ingredients too much or baked them slightly longer than recommended—next time, fold gently and start checking at 25 minutes. Icing too runny and won't stay on the shamrocks? Pop it in the fridge for a few minutes to firm up, then try again with a thicker application. If your shamrocks are crumbling as you cut them, your brownies might still be slightly warm; always wait for complete cooling first.
Make-Ahead and Storage Tips
You can bake the brownie base up to two days ahead and keep it wrapped tightly at room temperature, then cut and decorate the morning of your party for maximum freshness. The icing actually tastes better when made a few hours ahead because the flavors meld together—just store it in a covered bowl and give it a quick stir before spreading. Once decorated, these brownies sit happily in an airtight container for three days without drying out, though they rarely last that long in my house.
Ways to Customize Your Brownies
These brownies are perfect as written, but they're also a blank canvas for your creativity—I've added chopped pistachios, mini chocolate chips, and even a pinch of espresso powder to deepen the chocolate flavor. The icing can shift from standard green to mint green if you add a quarter teaspoon of peppermint extract, or you can skip the icing entirely and dust the warm brownies with powdered sugar mixed with green food coloring. Some people crush their brownie scraps and layer them with whipped cream and green icing for an easy trifle, which is honestly brilliant.
- Press your shamrock cutter straight down without twisting for the sharpest, cleanest edges.
- If you don't have a shamrock cutter, hearts or stars work beautifully and are just as festive.
- Save all those brownie corners and crumbs—they're perfect crumbled over ice cream or mixed into whipped cream.
 Save
Save These shamrock brownies have become my answer to every St. Patrick's Day gathering, and they've quietly become something people ask me to bring every year. There's nothing complicated about them, which is exactly why they work.
Recipe FAQs
- → What gives the brownies their fudgy texture?
The combination of melted butter, sugar, eggs, and a modest amount of flour creates a dense, moist texture characteristic of fudgy brownies.
- → How is the green icing made vibrant?
Adding green food coloring in small increments to a smooth mixture of powdered sugar, butter, milk, and vanilla extract achieves the vivid green hue.
- → Can the brownies be stored after decorating?
Yes, store decorated brownies in an airtight container at room temperature for up to three days to maintain freshness.
- → What is the purpose of the shamrock shapes?
The shamrock shapes add a festive, themed presentation suitable for St. Patrick's Day celebrations and enhance visual appeal.
- → Are there tips for cutting the brownies cleanly?
Using a metal shamrock cookie cutter and wiping it between cuts helps produce clean, defined shapes without sticking.
- → Can additional ingredients be added to the batter?
Yes, mini chocolate chips or chopped nuts can be folded into the batter to introduce extra texture and flavor.