 Save
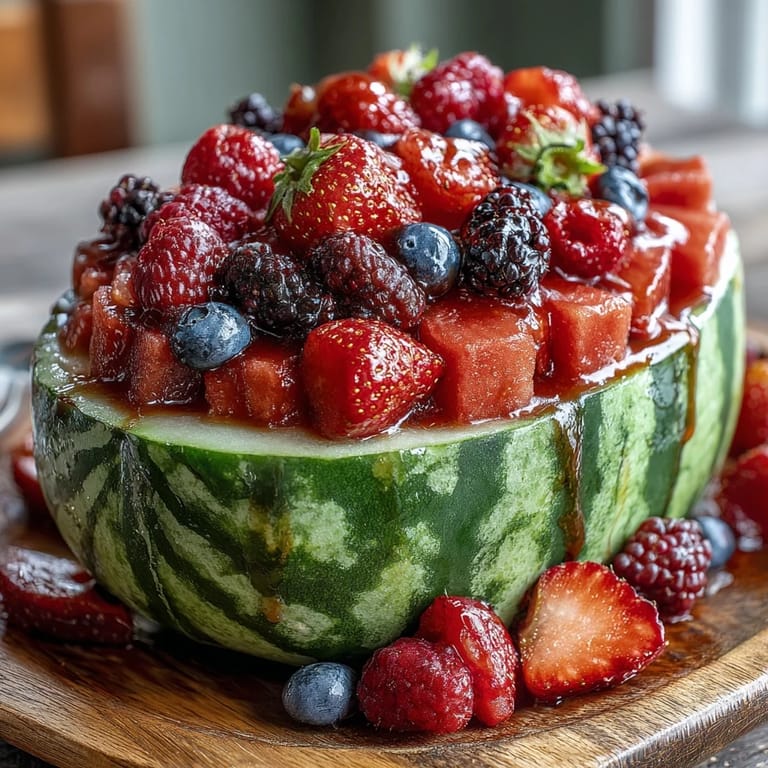
Save Last summer, my neighbor showed up at my door with a watermelon so massive I could barely carry it, insisting I do something spectacular with it for the weekend gathering we'd both promised to host. I stood in my kitchen, staring at this enormous fruit, when it hit me—why not carve it into something people would actually remember? The moment I scooped out that first hollow and filled it with jewel-toned berries, I realized I'd stumbled onto something that felt less like cooking and more like creating edible art.
I made this for my daughter's sixth birthday party, and watching the kids gather around the carved watermelon like it was buried treasure—carefully selecting their berries with the seriousness of museum curators—taught me something about presentation. When food looks like an adventure, suddenly everyone's more interested in actually eating fruit. By the end of the party, the whole thing was picked clean, and I'm pretty sure they still talk about the "watermelon boat" more than the actual cake.
Ingredients
- 1 large seedless watermelon (ripe and firm): This is your canvas, so pick one that feels heavy for its size and has a deep, hollow sound when you tap it—that tells you it's actually sweet and hydrated inside.
- 1 cup fresh strawberries, hulled and halved: Their bright red is non-negotiable for color contrast, and hulling them yourself (rather than pre-cut versions) keeps them firmer longer.
- 1 cup fresh blueberries: These little orbs roll around beautifully and add a color depth that photographs almost impossibly well.
- 1 cup fresh raspberries: Delicate, so add these last to avoid bruising, and they'll stay intact longer if you don't wash them until the very last moment.
- 1 cup fresh blackberries: Similar to raspberries, these are jewels that deserve gentle handling and reward you with complexity.
- Fresh mint leaves (for garnish): Don't skip this—the smell alone signals freshness and brightness, and a single leaf makes each bite feel intentional.
- 1 cup seedless grapes, halved (optional): These add a different texture and sweetness variation if you want to stretch the platter further.
- 1 cup pineapple chunks (optional): A tropical note that plays beautifully against the watermelon's delicate flavor.
- 1 lime, sliced (for garnish): Both aesthetic and functional—a squeeze of lime juice transforms the entire flavor profile at the last second.
Tired of Takeout? 🥡
Get 10 meals you can make faster than delivery arrives. Seriously.
One email. No spam. Unsubscribe anytime.
Instructions
- Start with immaculate fruit:
- Wash everything thoroughly and pat dry with paper towels—wet berries will slide around and lose their grip on presentation, and a slippery watermelon is nobody's friend when you're trying to carve.
- Create the base:
- Slice a thin disc off the watermelon's bottom so it doesn't rock on your serving board like an actual boat in choppy water. This step feels small but changes everything about stability.
- Make the boat shape:
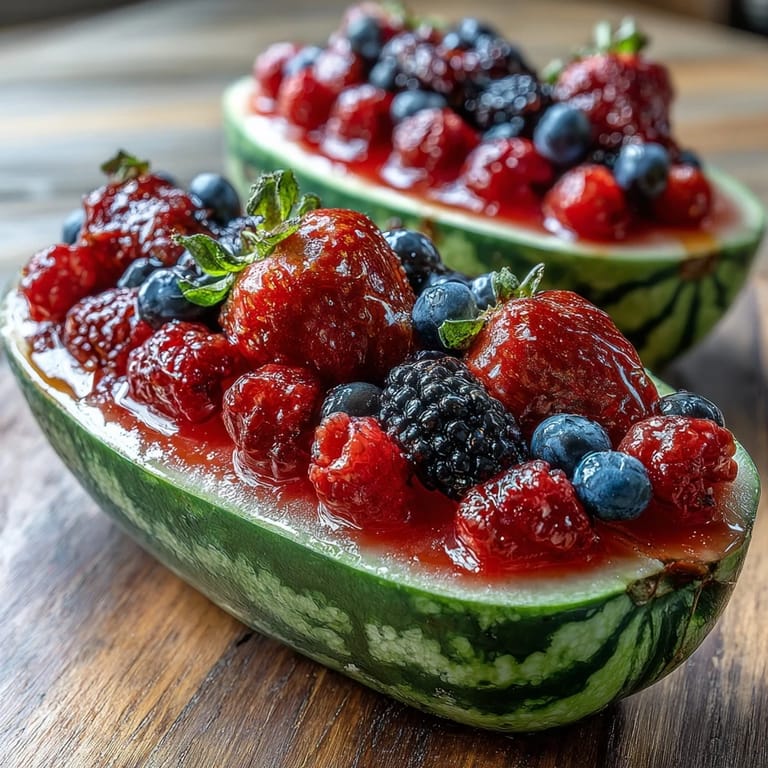
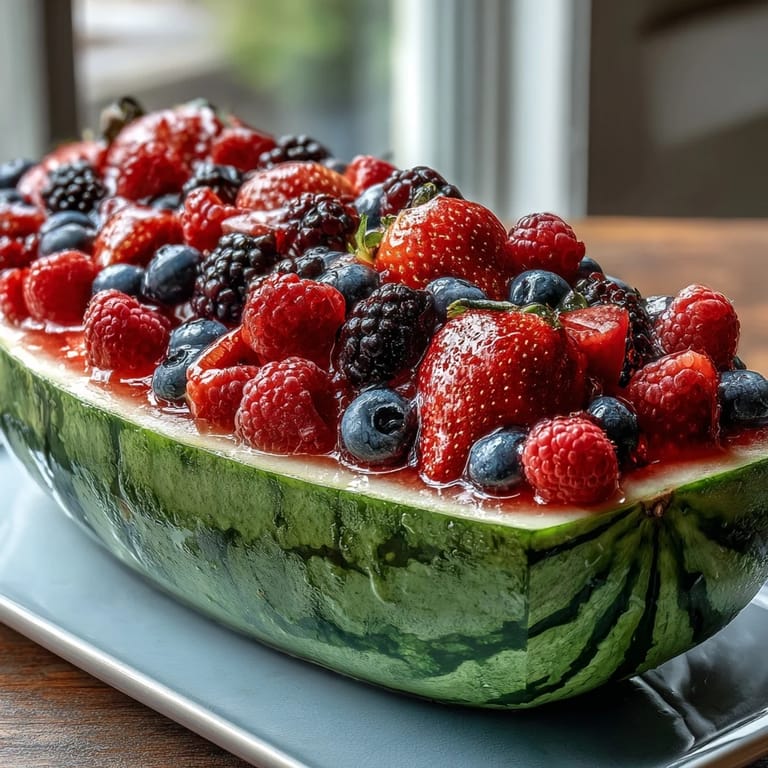
- Slice off the top third of the watermelon lengthwise, imagining you're opening a book rather than hacking randomly. The cut should be confident and clean—hesitant knife work shows.
- Hollow it out:
- A melon baller creates uniform, pretty scoops and is honestly worth the five dollars if you don't own one already, but a sturdy spoon works fine too. Scoop until you've got about an inch of shell remaining—too thin and your boat becomes a leak, too thick and it looks clumsy.
- Begin the layering:
- Return the watermelon pieces to the hollow shell mixed with roughly half your berries, nestling them so they're cradled rather than just scattered. This is where it starts looking intentional instead of accidental.
- Arrange the surround:
- Scatter the remaining berries and optional fruits across the board around your watermelon, letting colors create natural patterns without overthinking it. Your eye knows what looks balanced—trust it.
- Finish with garnish:
- Tear mint leaves gently to release their aroma and tuck them into crevices, then arrange lime slices around the edges like a frame. This last step takes thirty seconds and elevates everything.
- Serve or chill:
- Set it out immediately if your kitchen's cool, or refrigerate for up to four hours—any longer and the berries start surrendering to time.
 Save
Save There's something almost meditative about standing in front of a blank watermelon canvas, knowing you get to decide what it becomes. A friend once told me that the most memorable dishes aren't always the ones that take hours—sometimes it's the ones that take focus, that ask you to slow down for thirty minutes and think about how colors speak to each other. This dish does that.
Choosing Your Watermelon Wisely
The biggest mistake I made early on was treating watermelon selection like an afterthought. Now I actually take time at the grocery store—lifting melons, listening for that hollow thud, checking for a pale yellow spot on the bottom (where it sat ripening in the sun). A truly ripe watermelon doesn't just taste better; it scoops more cleanly, holds its shape longer, and the flesh stays vibrant instead of turning mealy. When you're building something on presentation alone, that quality matters intensely.
Timing and Temperature
I learned the hard way that a warm watermelon carving board is nobody's dream—serve this chilled whenever possible. If your kitchen's hot, do the actual carving thirty minutes before guests arrive, keep it in the fridge, then pull it out just as people are arriving. Cold watermelon tastes crisper, the berries stay fresher-looking, and there's something about the temperature contrast that makes it feel more luxurious somehow.
Making It Entirely Your Own
The magic of this recipe is how it welcomes improvisation without falling apart. Swap berries seasonally, add stone fruits in late summer, use whatever speaks to what's actually beautiful at your market. I've made versions with pomegranate seeds in winter, mango chunks in spring, and even added edible flowers from my garden once because they were blooming and seemed like they belonged. This is the kind of dish that gets better the more you make it your own.
- Use cookie cutters to punch shapes directly into watermelon flesh if you want to add an extra wow factor without much additional work.
- A light drizzle of lime juice right before serving wakes up all the flavors simultaneously and adds a brightness that feels almost sparkling.
- If you're bringing this to someone else's house, transport the carved watermelon and berries separately, then assemble at their place for maximum freshness and drama.
 Save
Save There's something quietly satisfying about feeding people something that tastes like summer and joy, especially when it took almost no actual cooking. This board has taught me that sometimes the most impressive meals are the simplest ones—the ones that celebrate what's already beautiful rather than trying to hide or complicate it.
Recipe FAQs
- → What tools are needed to prepare the watermelon carving?
You will need a large sharp knife to cut the watermelon, a melon baller or spoon to scoop out the flesh, a cutting board, and a serving platter or board.
- → Can other fruits be used besides berries?
Yes, seasonal fruits like kiwi, mango, or peach slices can be substituted or added to complement the arrangement.
- → How should the watermelon be prepared for serving?
Slice off the top third lengthwise to create a boat shape, scoop out the flesh leaving a sturdy shell about 1 inch thick, and fill it with mixed watermelon balls and berries.
- → What garnishes work well with this platter?
Fresh mint leaves and thin lime slices are ideal garnish options that add both color and subtle flavor enhancements.
- → Is this dish suitable for special diets?
Yes, it is naturally vegetarian, vegan, and gluten-free, making it suitable for many dietary preferences.
- → How long does preparation typically take?
The entire preparation time is approximately 30 minutes, allowing you to create an impressive fruit display efficiently.